how much space do you need to scan a vehicle? (and other 3d scan challenges)

The Takeaway
3D scanning works best with plenty of space around the entire vehicle.
As a rule of thumb, it’s preferred to have at least 5ft of clear space around the entire vehicle.
Crash investigators frequently have to deal with tightly packed vehicles and far less than desirable conditions.
Skilled and well prepared investigators can get the job done with just a couple of feet of space if need be.
Most of our vehicle inspections take place in some form of a storage yard. Whether it’s an auction site (like IAA or Copart), a tow yard, or a body shop - space is at a premium. To save space, cars are often packed in tight with just a couple feet between them. This can be a real challenge while trying to photograph damages and a real problem when trying to preserve the vehicle with a three-dimensional scan.
Terestrial laser scanners, like the Leica unit we mentioned in our last post, need space to setup a tripod and work best when there positioned roughly five feet back from the car. Some creative tripod use and scanner positions can usually overcome the challenges of a car that’s packed in too tight but mobile scanning solutions, like Recon-3D, can capture details in the tightest spaces - between cars, car interiors, and even engine bays or undercarriages. In today’s post, we’ll look at some of the challenges that come with scanning a vehicle for 3d modeling - including tight spaces, dim and uneven lighting, and cars with big, flat, reflective surface.
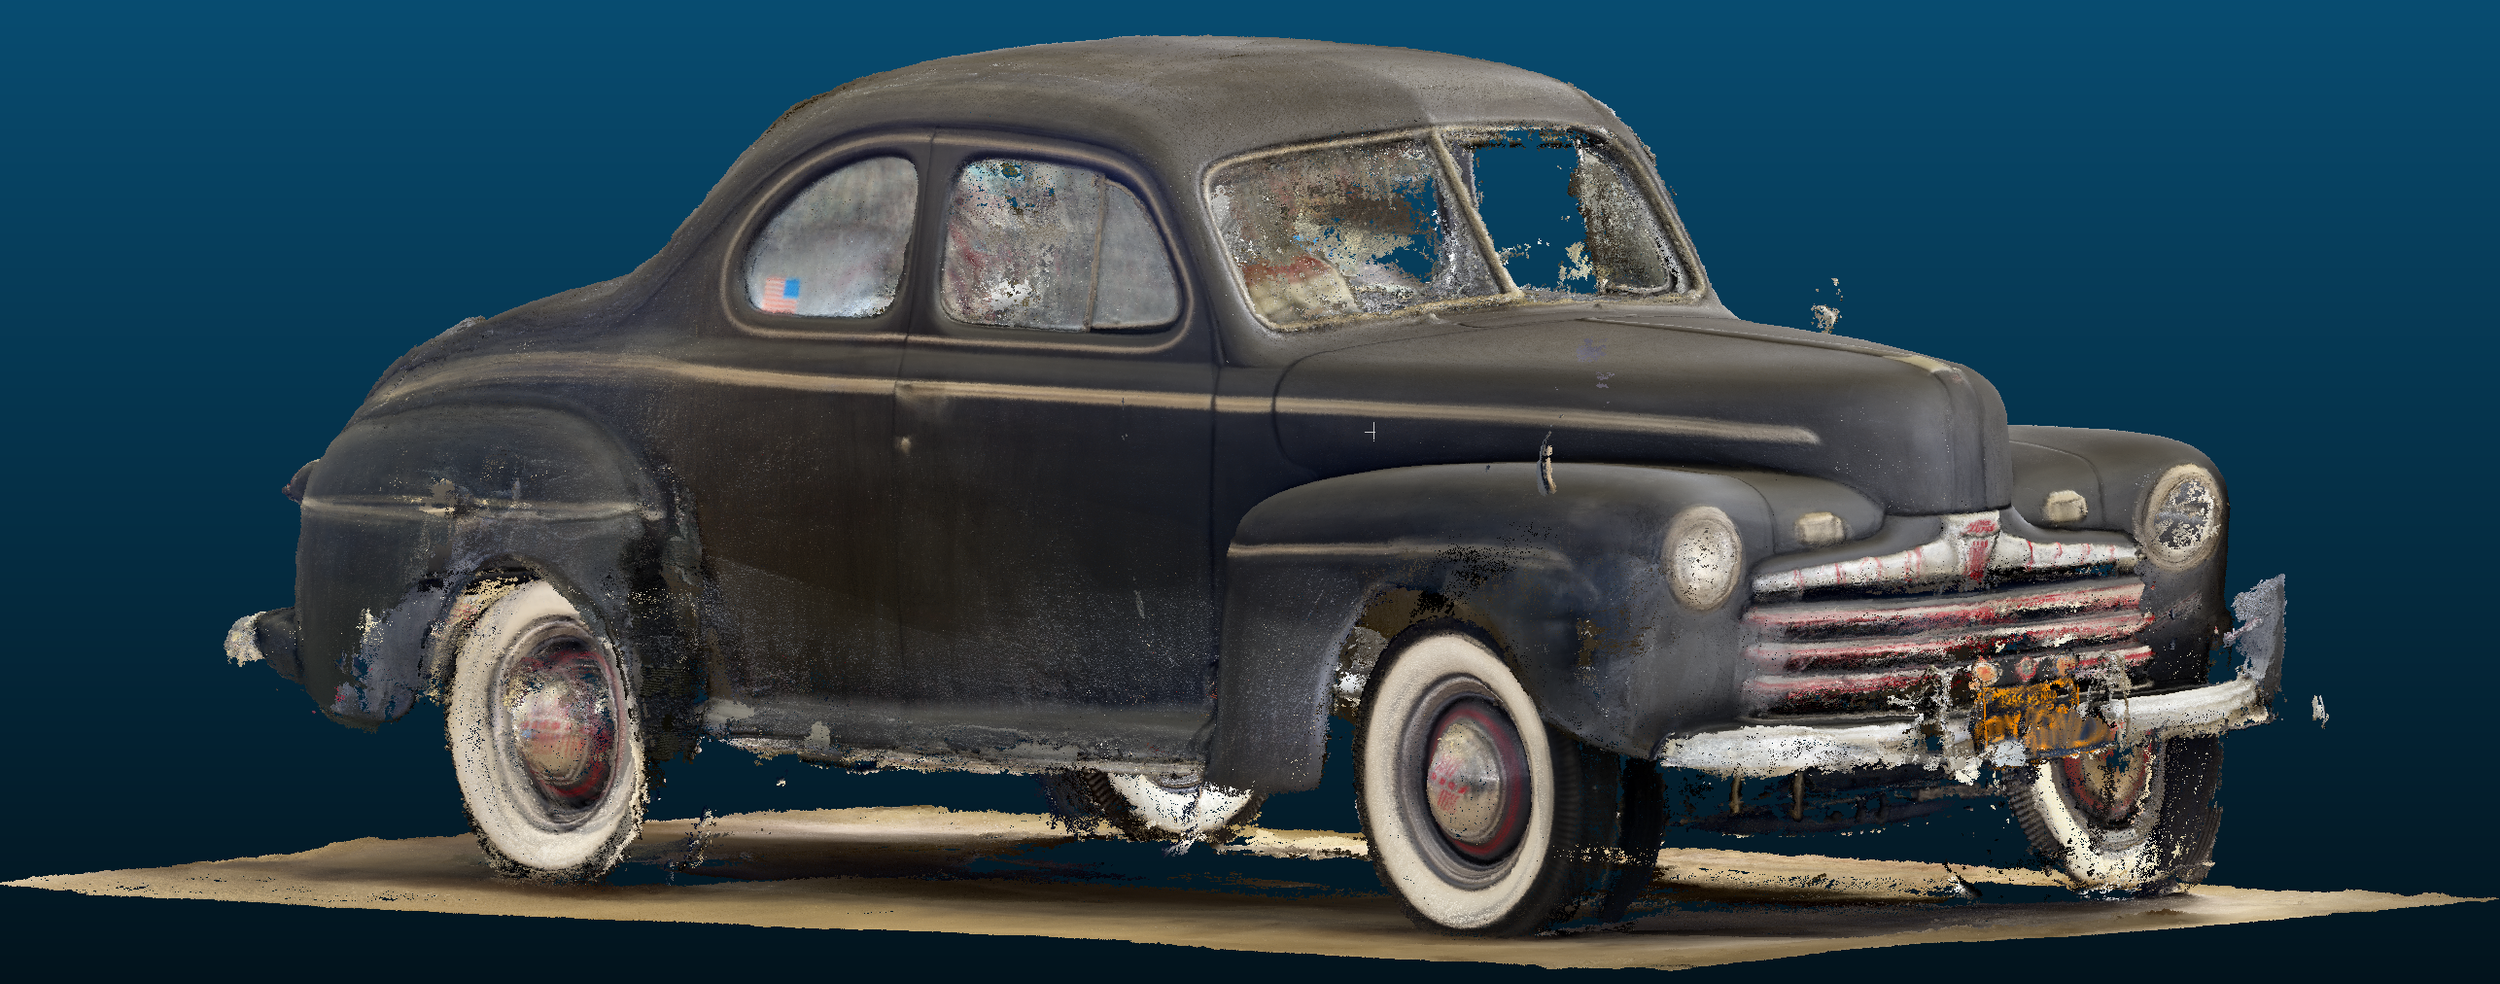
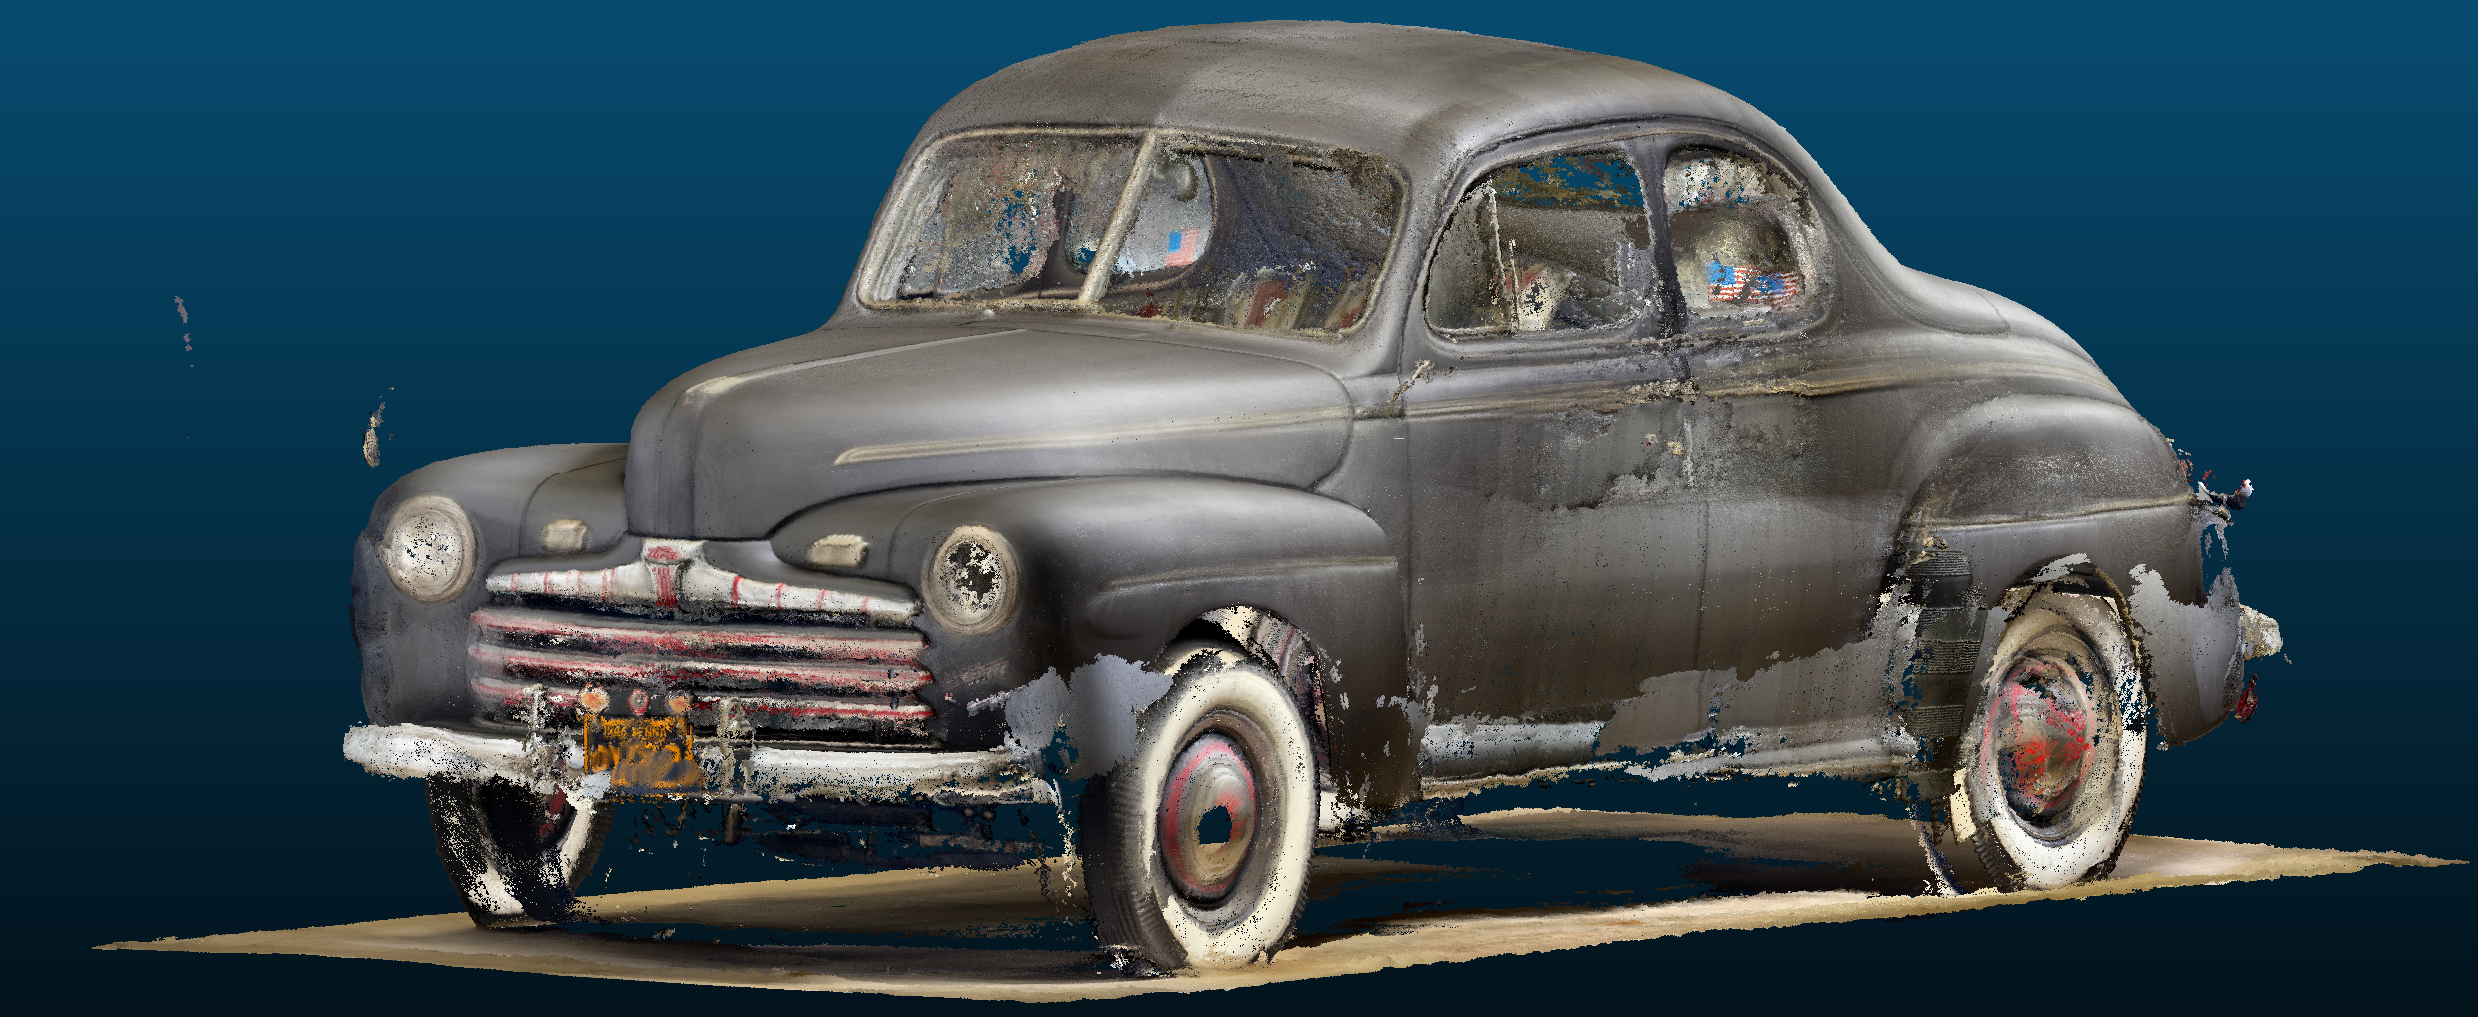
Introducing my late grandfather’s 1946 Ford Super Deluxe Business Coupe:

There’s a lot to take in here. After admiring the the car’s unique details and careful restoration, take note of all of the chrome and the highly reflective paint that challenge laser scanners.
A Real Challenge
This is no ordinary car. Its flathead V8 produced a whopping 100hp from the factory. The few electronics it does have are powered by a direct current generator that charges its 6V “positive ground” electrical system (the reverse of what we’re used to in modern cars where the chassis of the car is the electrical ground). The car is somewhat of an enigma with the way it’s enormous, sweeping, body panels come together to form something that looks imposing up close and yet slender and refined from a distance.
Opinions aside, this car is a problem for laser scanners. Laser scanners have difficulty capturing data points on highly reflective surfaces (like all that chrome and shiny paint), dark surfaces, transparent materials (e.g. glass windows), and on big/flat/smooth/featureless surfaces (like the Ford’s door panels, trunk lid, and roof). This is generally true for every scanning device on the market and is certainly true for photogrammetry based methods of modeling as well.
Some of these challenges, like the issue of big featureless surfaces, can be solved by moving the scanner farther from the car to allow it to see more features and context around the car. The idea here is essentially the same as what we referred to as “too close-up” photos. You can’t tell what your looking at when a photo is too close to the object and lacks the context of a wider or father away shot. This brings us right back to where we started this post - oftentimes, crash investigators have to deal with inspecting a car that’s surrounded by other cars or tucked away somewhere to tight to even open a door.
To make life more difficult, and test some techniques for overcoming these difficulties, I kept the 46’ Ford parked on one side of a two-bay garage and got to work making an accurate and reliable 3D model. The Ford wasn’t moved at all during this process and all scans were performed using a combination of Lidar and photogrammetry via Recon3D to make a colorized 3D model.
First attempt: all at once
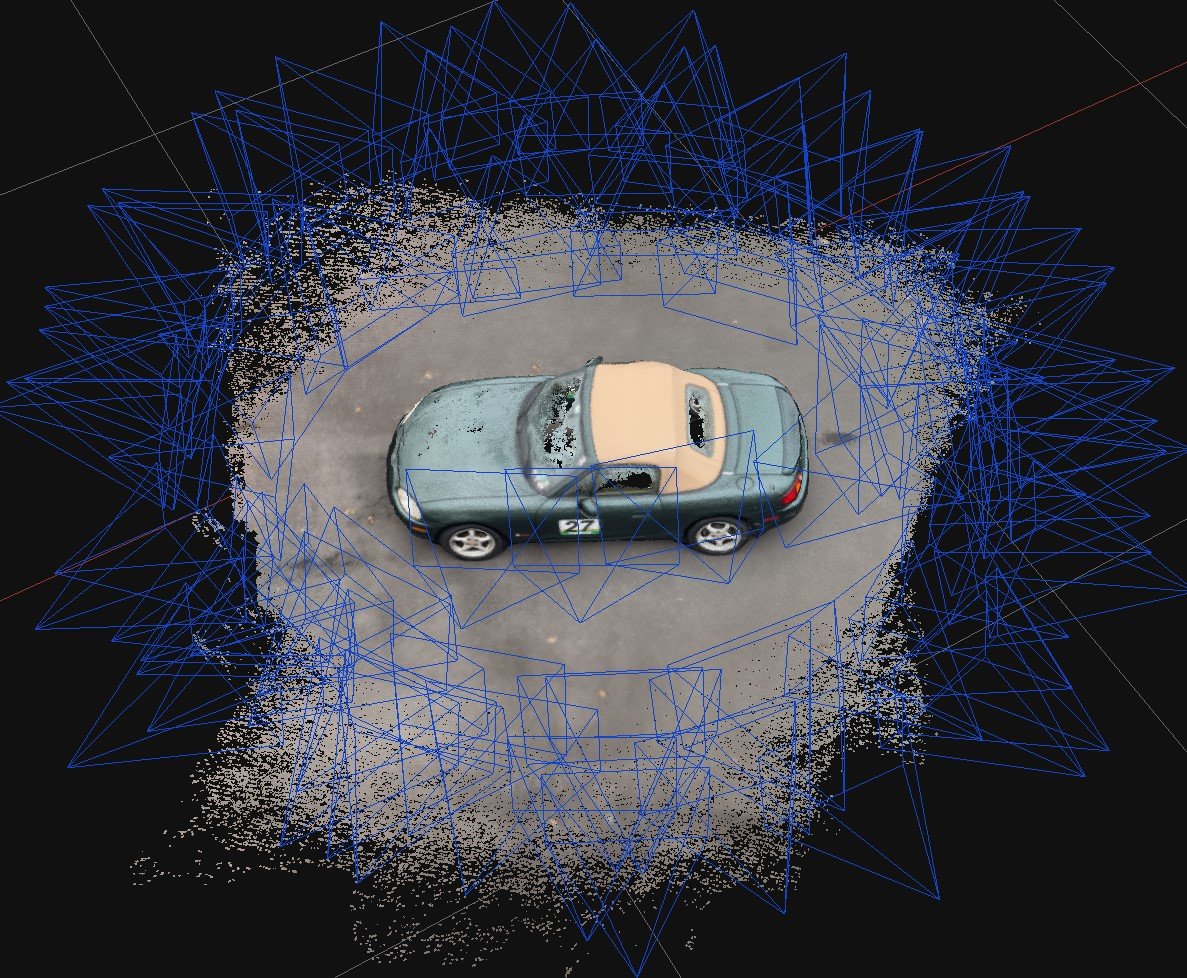
The blue prisms around this Miata show the camera positions in a typical orbital pattern.
If space was no issue, I would typically walk around the car in a large circle (usually called orbiting) several times, raising the handheld scanner above my head for one pass, lowering it to about the waistline for another, and lowering it further towards the ground for a final pass. By standing back, avoiding sudden movements or changes in direction with wide arcing movements, and repeating the same pattern at different scanner heights, Recon3D is able to capture the entire vehicle in just a few minutes of walking around. The challenges with shiny surfaces of the car are still an issue with this method but the scanner should have no issue making a complete model of the car to a high degree of accuracy.
Within the confines of a garage, the large circular path that I wanted to take turned into more of a rectangle with rounded corners. Being in the garage forced me to scan the Ford far closer than I’d like to be, particularly on the front, back, and driver’s sides where space was tight. I attempted to assist the scanner in figuring out what it was looking at by making uniquely shaped chalk marks on the ground and walls around the Ford. Temporary markings (e.g. painter’s tape, magnets, or stickers) can also be placed on the car for better results but there was absolutely no chance I’d be touching the paint on this particular car.
The results of this attempt were, as expected, not acceptable. Simply put, it was the technique I used to perform this scan just didn’t work under these conditions. Mobile scanners don’t like the abrupt changes in direction I had to make as a shimmied my way around the back of the car, along the driver’s side, and wrapped around the heavily-chromed from grille and bumper. The main issue with the resulting model was the misalignment of several parts that resulted in fragments of the model floating out of position, particularly on the driver side of the car where space was tight. The top-down perspective shows this best in the images below (look at the driver’s side and driver side front wheel in particular.


Second attempt - taken in halves

Yellow contour lines depict the linear paths used for this method.
For our second attempt, I used a far more linear path with just enough rotation of the scanner at the ends of the path to capture the front and back of the Ford. I essentially just walked back and forth along the passenger side of the vehicle, gradually increasing the height of the scanner and making small angle adjustments. After finishing the passenger’s side, the process was repeated on the driver’s side. This approach ensured there would be lots of overlap between passes with plenty of background features to help the scanner figure out the positioning. However, it also meant that I would end up with two separate models - one of the passenger’s side and another of the driver’s side.
There are a couple of drawbacks to using this method. First, as you can see in the images below, this method can lead to uneven colors in the model. The driver’s side of the car faced a couple of windows in the garage that caused that side of to appear a lighter shade of gray. Doing a single pass around the whole car ensures that the scanner’s camera (where all the color information of the model comes from) keeps a more consistent exposure and the colors come out more uniform on the final model. The second drawback is time. This method takes more processing on the back end to combine the models.
Despite the drawbacks, this method produced a clean point cloud with none of the misaligned, floating parts, from the first model. You may notice that this model has some pinholes around the body that the other model didn’t have. That’s not from the technique/method used. The lower point density is just the result of a shorter scan time in those areas that captured fewer points than the other model.


Here’s the final model after applying a mesh and texture:

The geometry of the final model is quite good, assuring that accurate measurements can be take from the model. You’ll notice that some details, like the front license plate and red pin striping on the grille, are a blurry. This is another consequence of scanning in a tight space. The device used for these scans combines measurements from the Lidar sensor with images recorded as a video. Individual frames are extracted from the video and the frames are used to apply color details to the model. When using this method, I typically prefer to take a second set of photos all around the vehicle with my Sony A7IV, a full frame mirrorless camera. The photos from the Sony camera are far higher quality than the images pulled from the video still frames and can be used to achieve nice crisp colors and details in the model. In this case, the tight conditions in the garage made it impractical to photograph the Ford with sufficient detail and image overlap using the Sony.
Final Thoughts
The trend of smooth transitions and long sweeping body contours died off in the 90’s as far as I’m concerned. Modern cars have far more unique features and sharp body lines that can help the scanner figure out what it’s looking at and where it‘s positioned (so to speak). Despite a dramatic reduction in chrome usage, modern vehicles still have big flat sections of shiny paint that can result in large holes in the final 3D model where data points weren’t captured.
Having more space to work around the car is always going to be preferred, not just for the comfort of the investigator but also for the quality of the scans. A skilled and well prepared investigator can overcome almost any space restriction but we’d rather not have to.